What’s New in SharpCap 4.0

SharpCap 4.0 has a whole host of new features, but there are three major features that give SharpCap far more power and flexibility than ever before:

additionally there are a number of ease-of-use improvements designed to make your imaging easier and less error-prone:

Still Camera Mode

SharpCap up to version 3.2 has run every camera like a video camera – that means that the camera is constantly taking images which show in SharpCap’s display. If you choose, you can save those images to video or picture files, but you cannot stop the camera from capturing images.

SharpCap 4.0 introduces Still Camera Mode as an alternative to the default Live Video Mode. In still camera mode, SharpCap only takes images when requested by the user pressing one of the capture buttons or by some other SharpCap function requiring an image to be captured. Most of the popular brands of camera supported by SharpCap can be used in Still Camera Mode, including Altair, QHY, SVBony, ZWO and ASCOM cameras.

You can switch between Live Video Mode and Still Camera Mode by using the new Live View button in the toolbar. When the button is highlighted you are in video mode, when it is not highlighted you are in still camera mode.

In Live Video Mode, the Live View button is highlighted, the image will constantly update and the familiar Start Capture, Quick Capture & Snapshot buttons are available.
In Still Camera Mode, the Live View button is not highlighted, the camera only takes images on demand and a new Framing Shot button is visible – this allows you to capture an image without saving it for purposes such as focusing, setting exposure, framing the image, etc.

Still Camera Mode is best suited to deep sky imaging, and is particularly useful for use with cameras that have a physical shutter (for instance DSLR cameras) or large format CCD cameras that take a long time to download the image to the computer. Still Camera Mode is also used by the Deep Sky Sequence Planner to ensure consistent results and allow reliable dithering.

Read more about still camera mode here.

The Deep Sky Sequence Planner

The Deep Sky Sequence Planner brings easy-to-use automated imaging to SharpCap for the first time. By simply choosing a few options regarding the set-up of your imaging session and entering a list of the types and numbers of frames to capture, you can quickly build an automated imaging plan. What’s more, almost every part of the plan has an individual Test button that you can use to make sure that the individual steps work correctly before letting the whole plan run.

Some of the things that the sequence planner can automate include:

  • Setting appropriate camera settings, including measuring sky brightness and using the Smart Histogram Brain calculations.
  • Using a GOTO mount to slew to the target and optionally center it using plate solving
  • Control camera cool down and warm up
  • Monitor autoguiding and dither between frames if desired
  • Autofocus before imaging and or when changing filters

Once you have designed your imaging sequence, you can even perform a Test Run to check that everything works when the individual steps are put together – this will run all the separate steps in the sequence but only capture a single frame of each type. You can then run your imaging sequence for real – either returning to the warmth of the house or monitoring SharpCap’s progress via the Sequence Progress Window.

Note: The Deep Sky Sequence Planner is a SharpCap Pro feature. Without a SharpCap Pro license, sequences will only be allowed to run for a maximum of 5 minutes.

Read more about the Deep Sky Sequence Planner here.

The Advanced Sequence Editor

The Deep Sky Sequence Planner uses a much more powerful and flexible sequencing technology built into SharpCap 4.0 to help plan and execute its sequences. If you want to set up an automated imaging sequence that isn’t possible using the Deep Sky Planner, you can use the full Sequence Editor to achieve your goals. You can even start out designing a sequence in the Deep Sky Sequence Planner and then press the Advanced Edit button to switch to the advanced editor to modify your sequence further.
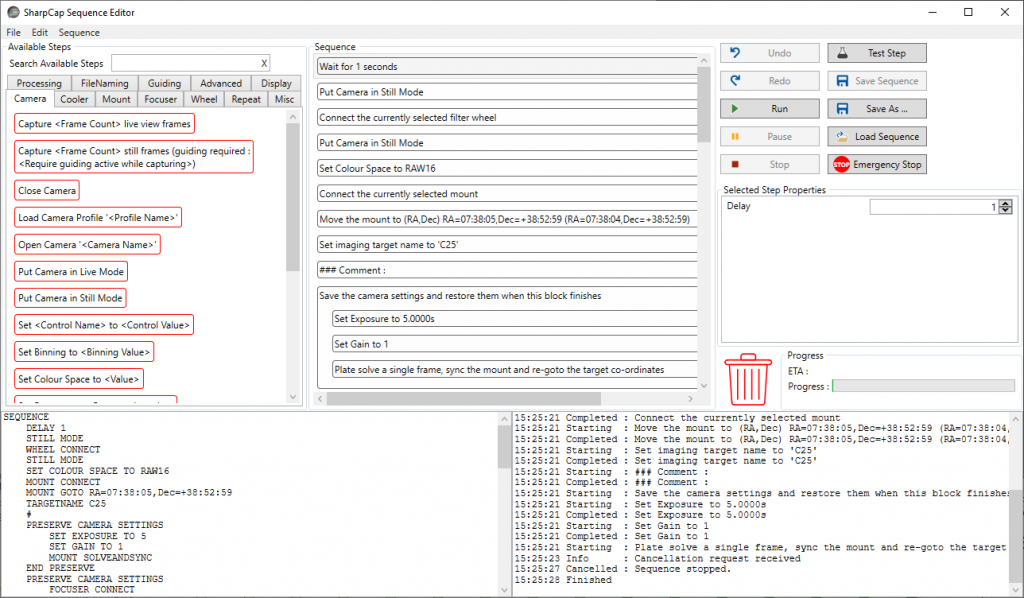
The SharpCap Sequence Editor

Sequences are built by combining in various combinations and orders in excess of 90 basic steps, each of which carry out a simple function such as setting the camera exposure, capturing frames or operating a mount or filter wheel.

Steps can be dragged from the Available Steps area on the left into the Sequence List in the centre, gradually building up a list of tasks for SharpCap to carry out. Things you can do from the sequencer include:

  • Selecting cameras, controlling their settings and capturing still frames or videos
  • Controlling filter wheels and GOTO mounts
  • Controlling electronic focusers, including autofocusing
  • Monitoring guiding applications, triggering dithering
  • Repeating groups of steps a fixed number of times or until a certain time
  • Waiting until a certain time or until an event such as sunset
  • Running other programs or launching SharpCap Python scripts

As with the Deep Sky Sequence Planner, the Sequence Editor has a strong focus on being able to test your sequences as you build them – use the Test button frequently to check that individual steps are correctly configured and work as expected.

The possibilities are already almost endless, and new functionality will be added via additional available steps to make the SharpCap sequencer even more powerful in future.

Note: The Advanced Sequence Editor is a SharpCap Pro feature. Without a SharpCap Pro license, sequences will only be allowed to run for a maximum of 5 minutes and certain steps are disabled entirely.

Read more about the Sequence Editor here.

Additional Image Processing Options

SharpCap 4.0 adds new built in image processing options:

  • Background Subtraction – this will remove a constant background brightness from deep sky images, which is particularly useful for eliminating sky glow (light pollution). The subtraction is compatible with dark and flat frame correction and will deal with situations where the sky glow has a colour cast.
  • Planetary Stabilization – this option keeps a planet (or other bright disc) in the center of the camera frame by offsetting each image as required. While it won’t help if the planet starts to drift out of view entirely, it will keep the target steady, helping with focus judgements and with outreach presentations.
  • Banding Suppression – some CMOS cameras have a tendency to produce fine horizontal bands that are visible when dark images are stretched to display faint deep sky targets. SharpCap can apply a targeted smoothing function to the image that will only affect these fine horizontal lines in the darkest parts of the image, reducing the effect of this banding on image quality.
These images show CMOS image banding without banding suppression (left) and with banding suppression (right).

These image processing options will not only affect the image seen on screen in SharpCap, they will also be applied to image data saved to video or image file (except for raw unprocessed frames saved while live stacking). Background Subtraction and Banding Suppression can be used in conjuction with Live Stacking.

Read more about Background Subtraction, Banding Suppression and Planetary Stabilization.

Pixel Value Readout

The pixel value readout overlay for a colour camera in RAW16 mode

Sometimes you want to see more detail about the brightness of the image than the histogram can provide – to see the intensitity of individual pixels. The Pixel Value Readout tool gives you that detailed information. Simply select the tool from the menu and then click on the area of interest in the image to see an overlay showing the data for the selected pixel.

You can use the zoom functionality to zoom in until individual pixels are clearly visible to be sure of selecting the target pixel.

For a colour camera in RAW mode, the overlay shows not only the red, green and blue values that the pixel has after debayering, but also the raw value of the pixel and which colour in the bayer matrix it is.

Read more about Pixel Value Readout.

Pixel Position Readout / Click to Recenter

Getting your target framed just right when you are deep sky imaging can be a bit of a process of trial-and-error. Even if you use plate solving to try to correct for any GOTO errors, adjusting framing if the target needs to be slightly off-centre is tricky.

With SharpCap 4.0, a GOTO mount and a configured plate solving application, all this becomes easy. Select the Pixel Position Readout / Click to Recenter tool, perform a plate solving operation if you haven’t already and SharpCap will then be able to show you the co-ordinates of any pixel in the image, along with the direction of the +/- RA & Dec axes within the image.

Double click on any point in the image and SharpCap will calculate the correct commands to send to your GOTO mount to put that point in the center of the image – even taking acount of any offset due to inaccurate mount movements.

The click-to-recenter part of this feature requires a SharpCap Pro license.

Read more about Pixel Position Readout / Click to Recenter.

Atmospheric Dispersion Corrector (ADC) Alignment

An atmospheric dispersion corrector is an invaluable tool for planetary imaging when the target planet is at a relatively low altitude in the sky – it allows you to largely cancel out the colour channel offset in the image created by atmospheric refraction.

Adjusting an ADC can be a bit of a fiddly procedure, largely because judging the point where best correction is achieved can be hard (just like judging the point of best focus can be hard). SharpCap’s ADC alignment tool helps out here but calculating the offset between the different colour channels in the image and showing an exaggerated representation of that overlaid on the image itself.

As well as showing the current colour channel offsets on the image, you will see a graph showing how the colour channel offsets have changed recently – allowing you to track the effects of your adjustments to the ADC.

Read more about ADC Alignment.

Improved ASCOM Hardware integration

SharpCap 4.0 has some significant improvements in the way that it integrates with ASCOM hardware such as GOTO mounts, focusers and filter wheels.

  • The ability to flip the direction that a GOTO mount moves in response to the up/down or left/right movement buttons.
  • The ability to adjust focus automatically when the filter is changed if your ASCOM filter wheel supports the Focus Offset feature and you have configured focus offsets.
  • The ability to compensate for backlash in ASCOM focuser movements. You can either configure the amount of backlash in SharpCap or tell SharpCap that the ASCOM driver is itself compensating for backlash.

All of these features can be configured in SharpCap’s Hardware Settings.

What’s New in SharpCap 3.2?

SharpCap 3.2 has a strong focus on improvements to the functionality available when Live Stacking – there are improvements and additions to other parts of the application, but most exciting new features are related to Live Stacking…

So, without further introduction, a quick tour of the new and improved features in SharpCap 3.2

New Night Mode Colour Scheme

SharpCap has had a basic night mode option for a long time, but even I’d have to admit that it wasn’t really very effective – it sort of made the controls and window dimmer and red, but that was about it. SharpCap 3.2 brings a new night mode colour scheme that is designed to give low monitor brightness but retain good readability. The use of an orange colour for text and controls instead of the more traditional red makes text legibility much better without adding significantly to the screen brightness. You can now toggle in/out of night mode quickly using the ‘F12’ key.

You may notice that a couple of things are not changed into a dark colour scheme – in particular scrollbars and the window title bar. It turns out that changing the colour these iterms isn’t possible without an awful lot of work, so these are currently not switched into night mode.

Two Monitor View

This has been quite a popular user request – the ability to show all the controls on one monitor and show just the captured image on a second monitor. This can be toggled using the keyboard (CTRL+F12) or using the new ‘Two Monitor View’ button on the toolbar.

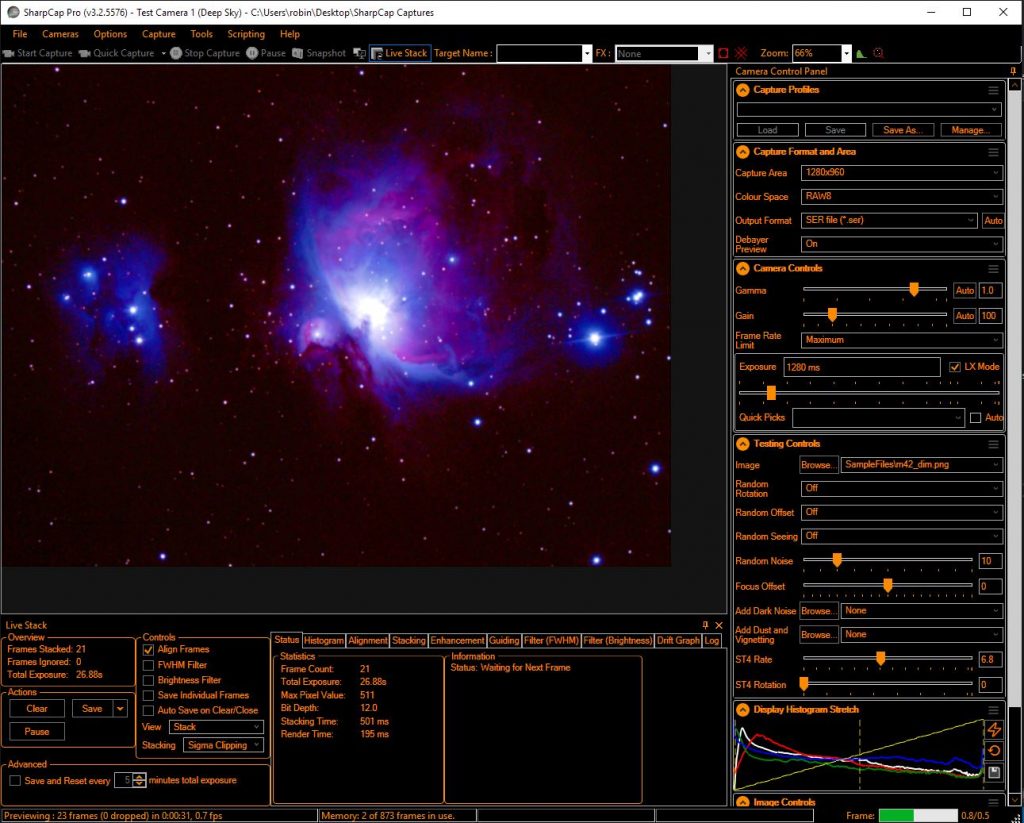
As you can see below, two monitor view is particularly helpful in Live Stacking mode because it allows room for the various Live Stack control and information tabs to be split up so that more than one is visible at a time.

Two Monitor View will be a SharpCap Pro feature.

Folder Monitor Virtual Camera

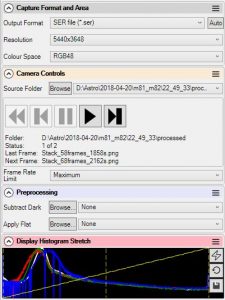
SharpCap can talk to a wide range of cameras directly and even more via either an ASCOM or DirectShow driver. It also has a pair of testing (simulated) cameras that can be used to try out the features of the program on cloudy nights. The Folder Monitor Virtual Camera adds another way to get images into SharpCap – it can read existing or newly added image files from a directory opening up new ways to use SharpCap. As a couple of examples:

  • You have a camera that isn’t supported by SharpCap, even using a DirectShow or ASCOM driver, but you have an application that will capture frames from that camera and save them to a folder. You can use the folder monitor virtual camera to load each new frame saved to the folder into SharpCap, allowing you to access SharpCap tools like focus measurements, live stacking, etc.
  • You have a series of image frames of a target captured with either SharpCap or another capture application. You can use the folder monitor virtual camera to live stack these frames in SharpCap (or repeat the live stacking with different parameters if these were frames originally saved in SharpCap).

The folder monitor virtual camera only has a limited set of controls available – it’s obviously not possible to adjust camera controls like exposure, gain or colour balance when the images are being read from saved files! The resolution and colour space values are also determined by the contents of the image files being loaded and cannot be changed.

You do have the ability to browse for the folder that contains the files you want to work with and move through the list of files in the folder either automatically (in play mode) or stepping forward/back manually in pause mode. Additionally dark subtraction and flat frame correction can be applied and the frame rate limit can be set.

To select the folder source, press the ‘Browse’ button and either select a folder (which will process all image files in that folder) or select an image file (PNG, TIF, FITS and JPG supported), which will process all image files of that type in the same folder.

Image files are always processed in date order (starting with the oldest first). The resolution and colour space values are selected from the first frame processed, and files that have different resolutions or colour space settings will be skipped. If SharpCap runs out of files in the folder (or if there are no image files in the folder initially) then it will wait for new image files to be added and load them when they appear.

The Folder Monitor Virtual Camera is a SharpCap Pro feature.

Live Stacking Improvements

Many EAA (Electronically Assisted Astronomy) enthusiasts are now keen to run their entire imaging session within a live stacking tool such as SharpCap – they are also often keen to avoid any post-processing in other applications. A number of changes in this version of SharpCap support this sort of EAA use.

Noise Reduction and Sharpening

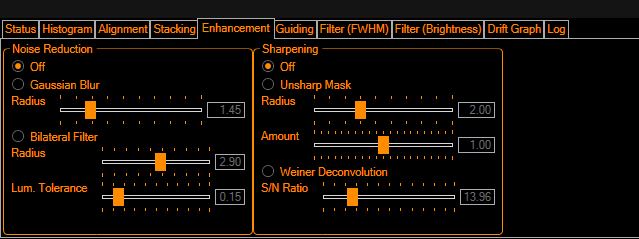
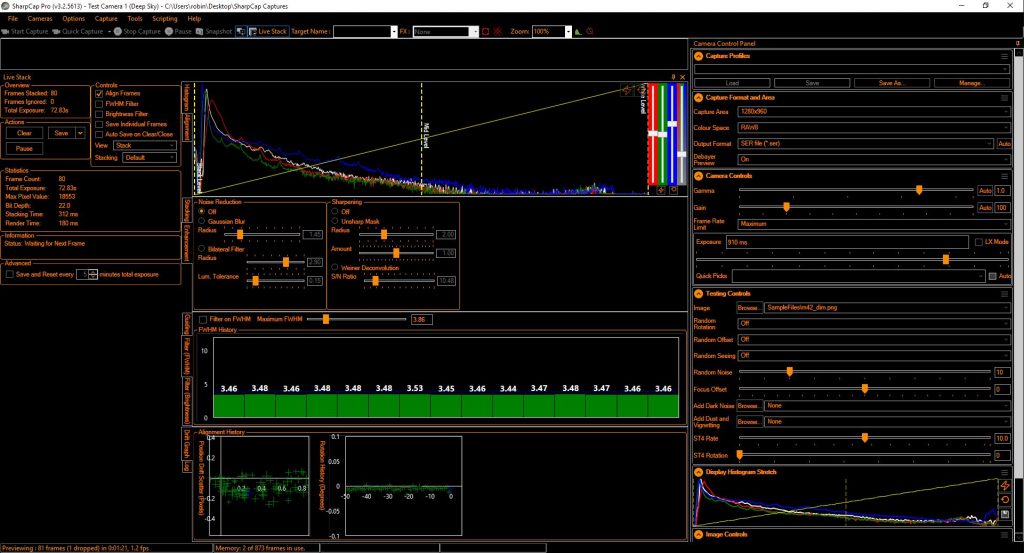
The Live Stacking enhancement tab now contains options for applying noise reduction and/or sharpening to the stacked image each time it is updated by adding a new frame.

There are two noise reduction and two sharpening options available (as well as the default of ‘off’ for both!). The Gaussian Blur noise reduction and Unsharp Mask sharpening are basic tools which you would find in most image manipulation applications. They are relatively quick to calculate. The downside of these options is that use of the ‘Gaussian Blur’ noise reduction tool will tend to reduce image sharpness and the ‘Unsharp Mask’ sharpening tool will tend to increase image noise. With careful adjustment of the parameters, these simple tools can suffice to give useful image improvements in many cases. The Gaussian Blur noise reduction tool does not require a SharpCap Pro license to use.

SharpCap Pro users also have the option to use the more sophisticated tools:

Bilateral Filter noise reduction which can lower noise with less blurring effect than the Gaussian Blur option. This tool will tend to remove noise within areas of similar colour without blurring an area of one colour into an adjacent area of another colour. The radius option selects over how large an area (in pixels) the smoothing is effective while the luminance tolerance specifies how different colours have to be for the algorithm to try to preserve the differences between them. Setting the luminance tolerance too high will make this algorithm give results similar to the gaussian blur option

Weiner Deconvolution is an advanced image sharpening algorithm that uses an estimate of the PSF (point spread function) of the image to try to correct for blurring introduced by optics, seeing and stacking. The estimate of the PSF is calculated from the shapes of detected stars in the stacked image (so this sharpening feature will only work for images containing stars). The only control that needs adjusting for this algorithm is the Signal-to-Noise ratio slider, which helps the algorithm determine which parts of the image are noise (and therefore shouldn’t be sharpened) and which parts are useful image (and should be sharpened). If this slider is turned up too high then you will see artifacts in the image – typically dark rings around stars and an ‘orange skin’ look to faint areas – if these symptoms are seen then turn down the S/N Ratio slider until a good result is achieved.

Note that both of the advanced algorithms require more computation than the simple ones, so using a fast PC is advisable, particularly for high resolution cameras.

Saturation control

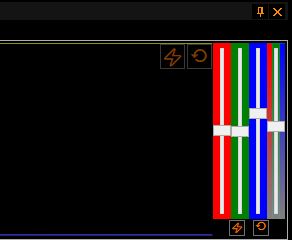
This is a simple addition to the live stacking colour balance controls that allows the saturation to be adjusted in the range 0 (monochrome) -> 1(normal colour) -> 3 (highly enhanced saturation). Like the white balance controls, saturation adjustment is a SharpCap Pro feature.

PHD2 Guiding and Dithering support

While SharpCap live stacking can automatically correct for image drift and rotation on unguided (and even Alt/Az) mounts, fixed pattern noise in the images being stacked can contribute to visible artifacts in the stacked image. A common example of this problem is so called ‘raining noise’ where darker or brighter pixels create dark or light streaks across parts of the image as their position on the stack drifts gradually. The resulting pattern can look like rain slashing downwards, hence the name. While proper use of darks and flats can help reduce or eliminate this issue, in some cases dithering can be the best approach as the random movements of the darker/lighter pixels ensure that there is no visible pattern that is easily noticeable to the eye.

SharpCap 3.2 adds support for monitoring the status of the PHD2 guiding application and also automatically triggering the dither functionality of PHD2 at a selectable interval. When the dither interval timer expires, SharpCap will wait for the current frame to end, stack it, pause live stacking and send a message to PHD2 to begin the dither movement. Once PHD2 reports that the dither movement has settled, SharpCap will wait for the frame currently in progress to end and then unpause live stacking and start the dither timer running again. This sequence should ensure that any frames that are streaked by the dither movement are not included in the stack.

Additionally it is now possible to set up SharpCap to automatically stop stacking if PHD2 loses it’s guiding lock and/or refuse to start stacking if PHD2 is not guiding – the first option is helpful to prevent a stack from being spoilt if guiding fails and the second simply helps avoid mistakes if you always want to guide while stacking.

Monitoring the status of PHD2 and automatically stopping stacking if PHD2 stops guiding does not require a SharpCap Pro license, but the automatic dithering function does. Note that currently the only guiding application supported is PHD2 and it must be running on the same PC as SharpCap.

Option to save exactly as seen on screen

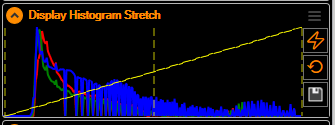
The display stretch controls in the mini histogram on the right hand side do not affect the saved image (they are only designed to affect the image as shown on screen in SharpCap). However, if you did want to save the image exactly as seen on screen the only way to do it was to take a screenshot, which is hardly idea.

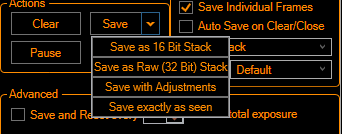
SharpCap 3.2 adds the option to save the image exactly as seen onscreen. The saved image is always saved as a PNG file in 8 bit depth regardless of camera bit depth or other save settings, since the goal here is to save an image for later vieweing rather than further processing. To avoid confusion with the normal save functionality, the save as seen function is activated by a small save button in the mini histogram.

Additionally, for convenience while live stacking the functionality can also be accessed from the live stack save drop down button.

Expanded Live Stack controls in two monitor mode

Perhaps a picture can say it all – when in two monitor mode you have much more space available so the Live Stacking controls use it

Auto “Stack Save and Reset” option

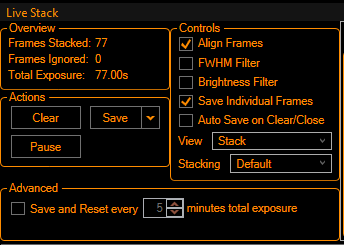
This is a simple but handy addition Live Stacking which allows you to set up the software to automatically save the current stack and reset to start stacking again automatically after a user defineable total stacking time has been reached. By setting this to 5 minutes, at the end of an hours stacking you will have 12 completed 5 minute stacks saved which can then be further post-processed in a more traditionally stacking application. The use of a number of shorter stacks reduces the chance of a large amount of data being spoiled by an unlucky event such as a airplane trail or by changing conditions. Of course live stacking has other ways to control these problems (Sigma clipped stacking, FWHM filter, brightness filter, etc, so be sure to explore those features too).

Other Improvements

Filename template improvements

The following new tags have been added to the filename templating engine

  • FrameDate
  • Exposure
  • Gain
  • BlackLevel

The Exposure tag will format the exposure in either seconds or milliseconds. The Gain and BlackLevel values are only available when the exposure time is over 100ms.

Flat frame capture improvements

SharpCap 3.2 improves the built in flat frame capture tool by allowing you to correct for camera black level (dark correction) when capturing flat frames. There are two ways that you can do this

  1. Use a pre-captured dark frame that was captured at the same camera settings that you are planning to use to capture flat frames. This provides the best correction, but requires you to manually capture and select a dark frame with appropriate settings. You should use this option if your flat frame exposure time is long enough to give you problems with hot pixels.
  2. Check the ‘Capture and Subtract bias frames to remove offset’ option in the Capture Flat window (this option can only be selected if normal SharpCap dark subtraction is *not* enabled). With this setting enabled, SharpCap will capture normal flat frames and then capture a series of very short exposure bias frames which allow the camera black level to be corrected for.

When using the automatic bias frame capture and subtraction you don’t need to cover the telescope aperture while the bias frames are being captured – the reduction in exposure time will be enough to make them dark (or close to dark) and even if they are not entirely dark it will not have an adverse impact on the quality of the final flat frame.

What’s new in SharpCap 2.9.2877?


  • Polar Alignment – improved plate solving algorithm – faster, more robust
  • Polar Alignment – more options for tweaking star detection
  • Live Stacking – Add option to save separate image files for each stacked frame
  • Live Stacking – Reset button to reset histogram controls
  • Altair Cameras = Updated SDK – add Gamma and Colour Balance to RAW mode
  • QHY Cameras – Add support for controlling cooler on cooled CMOS models
  • QHY Cameras – Better support for filterwheels connected via camera
  • QHY Cameras – Updated SDK – Add support for new models
  • ZWO Cameras – Default into RAW mode not RGB (consistent with other colour Astro cameras)
  • ASCOM Cameras – fix bugs with loading capture profiles
  • Celestron/Imaging Source Cameras – fix frame progress showing incorrectly
  • UI – Allow different heights for different lower panels
  • Increase memory allocated to frame buffers to better support large resolution cameras (ZWO1600, QHY183 etc)
  • Various other bug fixes


What’s New in SharpCap 2.9.2529

This updated beta build has a lot of bug fixes in it, along with some significant changes to the way that the Focus Score feature works, particularly if you have an ASCOM focuser connected to SharpCap.

With a focuser connected, a new graph mode is available that shows a plot of the quality of focus against the focuser position. Green up pointing triangles are readings taken when the focuser is moving in the +ve direction, red down pointing triangles are readings taken when moving in the -ve direction – these are different to allow you to cope with any backlash in the focuser position. You just need to get the focuser position (shown by the blue vertical line) to the maximum (or minimum – for FWHM) of the graph and your focusing should be done.

The full change summary is:

  • File Naming – creates sequentially numbered files instead of multiple files called 0001 in different directories
  • File Naming – more informative name for single frame captures.
  • Live Stacking – pause button added to temporarily stop adding new frames
  • Live Stacking – better file naming
  • Live Stacking – Add digital gain and other new star detection tweaks.
  • Focus Score – Add new Fourier Transform Focus Score
  • Focus Score – Add smoothed trace to bar chart
  • Focus Score – Add mean value to bar chart when using an ASCOM focuser
  • Focus Score – Add new graph of score vs position when using an ASCOM focuser
  • Focus Score – Remember size/position of selection area
  • Test Cameras – Improved planetary test camera
  • Updated SDKs Altair, QHY
  • Attempt to fix vanishing histogram bug
  • Fix colour order wrong in dark stacks on colour cameras
  • Many bug fixes

What’s new in SharpCap 2.8.2311

This release is mostly about bug fixes, although there are a couple of new features like clickable links in the notification bar and custom resolutions on QHY cameras.

  • QHY – Fixes for controlling built in filter wheel
  • QHY – updated SDK, fix binning crash
  • QHY – custom ROI selection now available
  • Altair – updated SDK – auto exposure no longer turns on auto gain too
  • SER file writing – show dropped frames due to disk write speed limit hit
  • Capture Sequences – fix menus disabled in second and subsequent captures
  • DirectShow cameras – fix for missing advanced tools when camera has to retry startup
  • DirectShow cameras – fix crash when saving stacked images on certain cameras
  • UI – do not show post capture status in status bar, as it’s now in the notification bar
  • UI – clickable links to captured file and folder in notification bar
  • Fix crash due to missing user-created python startup scripts
  • Fix controls and other panels cannot be clicked on when set to auto-hide
  • Installer – re-enable and fix installing to custom location

As always, the installer can be found on the downloads page.

SharpCap 2.7.2135

This version of SharpCap contains fixes for a couple of bugs found in build 2125

  • Live stacking resets on ZWO cameras whenever the sensor temperature changes (also on other cameras with temperature sensors)
  • Timeouts on very long frames on some Altair cameras

Additionally, 2125 made the following changes over 2108

  • Fix broken saving from live stack under some circumstances
  • Fix saving to AVI files from mono astro cameras creating an RGB AVI (note that the mono AVI now created is upside down – it was turning it the right way up that made it get converted to RGB by DirectShow)
  • Add support for trigger mode on latest Altair cameras (latest model GPCAM)
  • Live Stacking – disable alignment in RAW modes as it would lead to the different colour channels being mixed
  • Live Stacking – do not include star highlight boxes when saving ‘As Viewed’
  • Updated Altair and ZWO SDKs

Hopefully the last 2.7 Beta build – 2.0.2095 now available

Probably the most significant new feature in this build is the ability to perform dark subtraction when using all Astro cameras (QHY, ZWO, Altair, iNova, ASCOM, Basler, etc). This functionality can be found in the ‘preprocessing’ section of the camera controls – you just need to select a dark frame which matches the resolution and colour space that you are using to capture. Dark frames can be in PNG or FITS format (8 or 16 bpp). SharpCap will perform basic fixes when loading a dark frame – for instance a 24 bit (8 bit depth RGB) dark will be converted to a 32 bit (8 bit depth ARGB) dark (or vice-versa) if required.

General purpose dark subtraction is not yet available for cameras being used via webcam (DirectShow) drivers. Supporting this would require significant changes to the way webcams are handled and I’m not convinced it could be done without introducing other issues. Dark subtraction *can* be used with webcams if you are using the live stacking functionality however. One thing to be aware of is that you shouldn’t use two lots of dark subtraction (in the camera controls and in live stacking – there’s currently nothing to stop you from doing this, but the result’s probably won’t be pretty!).

Final words on dark subtraction – it affects both the preview of the frame as seen on the screen and the frame as saved to any output file when capturing.

Other significant features in this build:

  • In live stacking there is now a graph of the FWHM of recent frames (on the filter tab) – this can help you set a sensible value for filtering out poor quality frames
  • The main focus score graphs for FWHM and Contrast detection now have an extra line which shows the focuser position if you have an ASCOM focuser selected – this should help you easily spot the value that gave the best focus measurements.

Bugs fixed include

  • Fix UI lock up during single frame capture which made it hard to cancel single frame sequences
  • snapshot could save to PNG when preference was for FITS
  • stop capture profile being loaded during capture

Note: The original build 2089 had a bug which sadly disabled live stacking (2 lines of code in the wrong order). 2095 corrects this as well as fixing a few other small issues.

SharpCap 2.7.2027 Beta now available

The big news of this release is the addition of support for Celestron/Imaging Source cameras. A big thank you to f1telescopes for organising some cameras for me to work with, which is really the only practical way to support a new model of camera. SharpCap should offer pretty much full control of these cameras now, including ROI, binning, 12/16 bit modes, RAW output etc. Obviously I’ve tested with just a couple of models, so there could still be gremlins lurking in other models in the range – bug reports welcome.

Another improvement to camera support in this release is a further update to the new QHY SDK, which, along with some bug fixes in the SharpCap code, means that more QHY cameras should be supported correctly now. I’ve had reports of pretty much the whole QHY5**** range working correctly. Thanks to Modern Astronomy for the help in getting this sorted.

ZWO owners need not feel left out – particularly if you are lucky enough to have one of the new cooled models which now will show the thermal stats in the status bar for easy reference. Additionally there have been a few more bug fixes in both SharpCap and the ZWO SDK.

To round off the ‘cameras with an updated SDK’ list, Altair and Basler cameras also both have updates. Basler cameras now need Pylon v5 installed and have had a few bug fixes applied to make sure they work nicely with the new UI for exposure.

Aside from a number of issues reported via the online error report submission, one fix of note is that when I added support for RGB to the SER file format a while back I didn’t notice that the byte order was actually BGR, which means that the red and blue channels are swapped in RGB SER files up until this new build which fixes the issue. SharpCap still writes BGR format to SER, but now flags it correctly in the header. I wouldn’t necessarily advise using RGB/BGR SER output if you have RAW available, since there is no gain in quality and the file is 3 times bigger…

Finally, you’ll notice that SharpCap has a new installer. This is needed because the Celestron/Imaging Source SDK needs a Microsoft component to be installed to work properly and rather than just warn you that it was missing I thought that the right approach was to install it automatically. To be honest, lots of people will have this component installed already as many different software packages rely on it, but in that case the installer will happily skip over it, and if you don’t happen to have it, everything will just work. The new installer needs a bit of love and care applied to its UI – probably by the next release.

Anyway, as usual find the download here.

SharpCap 2.7.1954 Beta

What’s new in SharpCap 2.7.1954 Beta?

  • Live Stacking – make Test Camera available in released code for experimentation with these features
  • Live Stacking – much improved handling of reading dark frames – will convert bit depth and 3/4 colour planes as required
  • Live Stacking – add options to save stack as a dark or as viewed (ie including histogram adjustments)
  • ZWO cameras – Bug fixes to SDK – fix crash on selecting low resolution (ie 800×600)
  • ZWO cameras – fix issue where selecting custom resolutions and binning could lead to a crash
  • Altair cameras – SDK update – support for updated GPCAM versions
  • QHY cameras – new SDK – support for more cameras and extra features
  • Timestamp frames – Fix bug where frames were being timestamped incorrectly in some compressed modes (YUY2 etc)
  • Frame grabbers – attempt to operate if driver has no media control interface
  • Handle disk filling up in a more rational way (ie report a message rather than ignoring or freezing)

Note that the live stacking feature does not yet support alignment of 16 bit depth images (and the test camera doesn’t yet support the rotation/offset functions on these images either).

As always, the installer can be found on the download page. Note that you should be able to install this version alongside 2.6, so no need to uninstall 2.6 first.

SharpCap 2.7.1885 Beta

This build brings a lot of new improvements in the Live Stacking feature, including…

  • Alignment and derotation tab – Alignment is now enabled by default (and can be turned off on the alignment tab. Alignment requires at least 3 stars to be detected in the image – if 2 or less stars are found then the frame is not stacked, so turn this off for non-astro images.
  • You can tick the ‘Highlight Detected Stars’ check box to see what stars are being detected. Yellow highlighted stars are being used for alignment, other detected stars are highlighted in red. Adjust the minimum and maximum star width and try the reduce noise option to alter the star detection parameters.
  • The levels of the stack view can be adjusted by changing the black level, grey level and white level sliders on the histogram page. Also the gradient slider can be used to increase the maximum slope of the levels transfer curve. Note that when the stack is saved these levels adjustment are *not* applied to the saved file.
  • Apply a dark field subtraction to each frame before stacking by selecting a dark frame on the darks tab (note: only PNG files can be loaded as darks at the moment).
  • Filter stacked frames by FWHM – turn this option on on the Filtering tab and then set the maximum FWHM to be allowed. Frames with a FWHM bigger than this will be dropped.

All of these features are very new, so please report any issues that you find. The UI for controlling these features needs further improvements – please just work with it for now!

As always, builds can be found on the downloads page.