
If you have a question or problem with SharpCap then hopefully you will find the answer in the FAQs below. If not, you might find the answers you need in the documentation or by searching or posting on the forums.
Getting Started
SharpCap 3.2 (and older versions) work like a video camera – they take pictures all the time. This can cause problems with cameras that take a long time to transfer the image to the computer, like large CCDs and DSLR cameras – SharpCap may not respond during the image download time and when that is complete a new image will be captured and start the download process again.
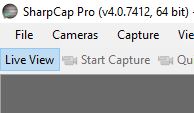
For these cameras, please use SharpCap 4.0. Before opening the camera, deselect the ‘Live View’ option in the toolbar so that it is no longer highlighted blue:
Once you have turned off ‘Live View’, open the camera. In this mode, SharpCap will only take images on request (if you press ‘Start Capture’ , ‘Quick Capture’, ‘Snapshot’, etc.). You can also take an image without saving it using the ‘Framing Shot’ button.
The simplest way to do this is to hold down the CTRL key while the camera is opening – this stops SharpCap from loading any previously saved values for the controls. It’s probably a good idea to close and re-open SharpCap before doing this.
You can also go to the SharpCap Settings and untick the box labelled ‘Automatically restore the last used camera settings when opening a camera’ – this will stop SharpCap from re-using the previous settings permanently.
If you are using SharpCap for Astrophotography with a camera that is specially designed for Astronomy, then we would recommend the following:
- Capture videos of the sun, moon or planets to SER format using RAW8 (if you have a colour camera) or MONO8 (if you have a black and white camera). If neither of these options is available, choose RGB.
- Capture still images of deep sky objects for further processing using RAW12/14/16 or MONO12/14/16 to FITS format.
- Save processed images for viewing (for example from Live Stacking) to PNG format.
If you are using SharpCap for general imaging, you may wish to use AVI format for videos and PNG format for still images.
If you are capturing long videos (for example an all-sky camera), choose RGB and save the video to WMV format.
Finally, if you are imaging transient events such as occultations, you may wish to consider saving to ADV format.
If you zoom in on the image you might see a grid pattern of brighter and darker pixels at the pixel level. The colour is encoded in this pattern – it’s called a RAW image. SharpCap understands this and converts the image to colour before displaying it.
In order to see your saved images in colour you need to use an image viewing or processing application that understands RAW images and can recover the colour information (this is called ‘debayering’). For more information read this thread in the forums and this document.