
SharpCap 3.2 has a strong focus on improvements to the functionality available when Live Stacking – there are improvements and additions to other parts of the application, but most exciting new features are related to Live Stacking…
So, without further introduction, a quick tour of the new and improved features in SharpCap 3.2
New Night Mode Colour Scheme
SharpCap has had a basic night mode option for a long time, but even I’d have to admit that it wasn’t really very effective – it sort of made the controls and window dimmer and red, but that was about it. SharpCap 3.2 brings a new night mode colour scheme that is designed to give low monitor brightness but retain good readability. The use of an orange colour for text and controls instead of the more traditional red makes text legibility much better without adding significantly to the screen brightness. You can now toggle in/out of night mode quickly using the ‘F12’ key.
You may notice that a couple of things are not changed into a dark colour scheme – in particular scrollbars and the window title bar. It turns out that changing the colour these iterms isn’t possible without an awful lot of work, so these are currently not switched into night mode.
Two Monitor View
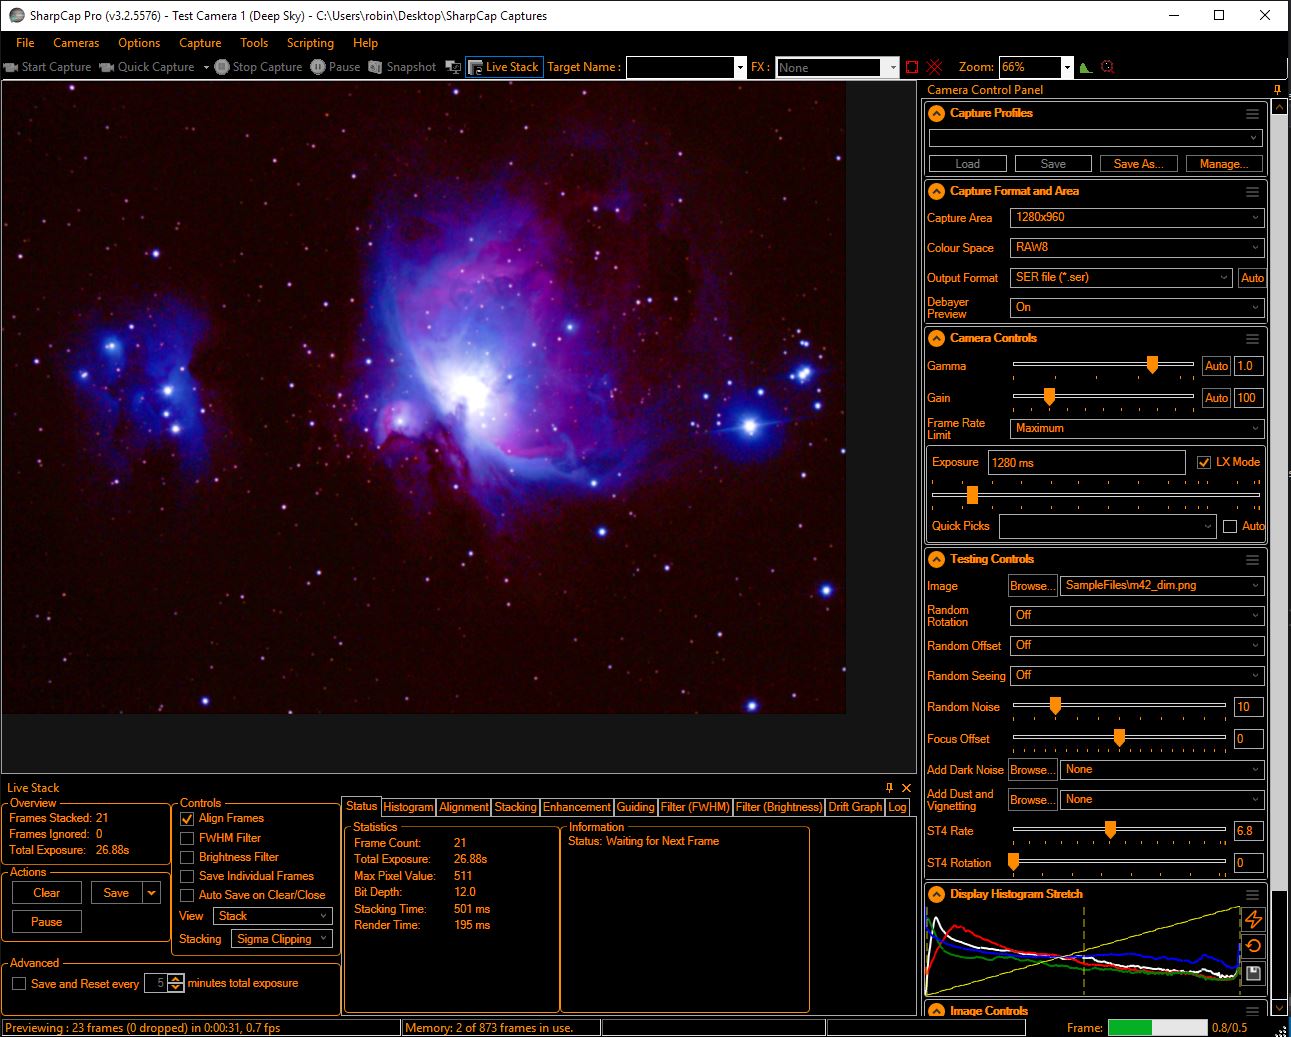
This has been quite a popular user request – the ability to show all the controls on one monitor and show just the captured image on a second monitor. This can be toggled using the keyboard (CTRL+F12) or using the new ‘Two Monitor View’ button on the toolbar.
As you can see below, two monitor view is particularly helpful in Live Stacking mode because it allows room for the various Live Stack control and information tabs to be split up so that more than one is visible at a time.
Two Monitor View will be a SharpCap Pro feature.
Folder Monitor Virtual Camera
SharpCap can talk to a wide range of cameras directly and even more via either an ASCOM or DirectShow driver. It also has a pair of testing (simulated) cameras that can be used to try out the features of the program on cloudy nights. The Folder Monitor Virtual Camera adds another way to get images into SharpCap – it can read existing or newly added image files from a directory opening up new ways to use SharpCap. As a couple of examples:
- You have a camera that isn’t supported by SharpCap, even using a DirectShow or ASCOM driver, but you have an application that will capture frames from that camera and save them to a folder. You can use the folder monitor virtual camera to load each new frame saved to the folder into SharpCap, allowing you to access SharpCap tools like focus measurements, live stacking, etc.
- You have a series of image frames of a target captured with either SharpCap or another capture application. You can use the folder monitor virtual camera to live stack these frames in SharpCap (or repeat the live stacking with different parameters if these were frames originally saved in SharpCap).

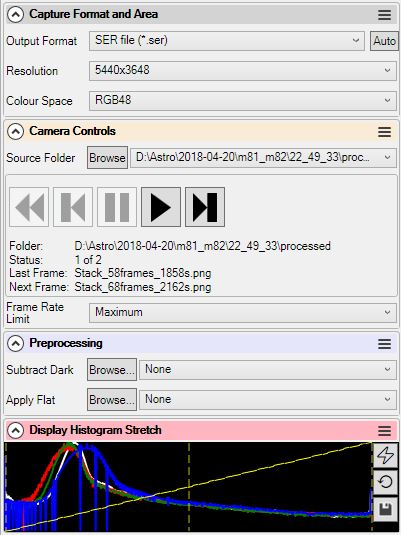
The folder monitor virtual camera only has a limited set of controls available – it’s obviously not possible to adjust camera controls like exposure, gain or colour balance when the images are being read from saved files! The resolution and colour space values are also determined by the contents of the image files being loaded and cannot be changed.
You do have the ability to browse for the folder that contains the files you want to work with and move through the list of files in the folder either automatically (in play mode) or stepping forward/back manually in pause mode. Additionally dark subtraction and flat frame correction can be applied and the frame rate limit can be set.
To select the folder source, press the ‘Browse’ button and either select a folder (which will process all image files in that folder) or select an image file (PNG, TIF, FITS and JPG supported), which will process all image files of that type in the same folder.
Image files are always processed in date order (starting with the oldest first). The resolution and colour space values are selected from the first frame processed, and files that have different resolutions or colour space settings will be skipped. If SharpCap runs out of files in the folder (or if there are no image files in the folder initially) then it will wait for new image files to be added and load them when they appear.
The Folder Monitor Virtual Camera is a SharpCap Pro feature.
Live Stacking Improvements
Many EAA (Electronically Assisted Astronomy) enthusiasts are now keen to run their entire imaging session within a live stacking tool such as SharpCap – they are also often keen to avoid any post-processing in other applications. A number of changes in this version of SharpCap support this sort of EAA use.
Noise Reduction and Sharpening
The Live Stacking enhancement tab now contains options for applying noise reduction and/or sharpening to the stacked image each time it is updated by adding a new frame.
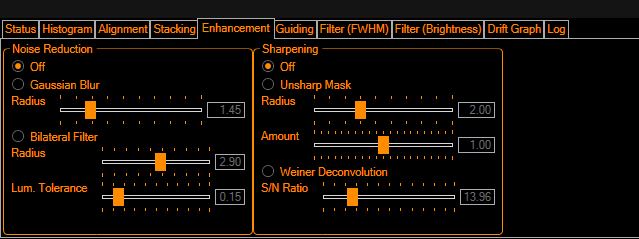
There are two noise reduction and two sharpening options available (as well as the default of ‘off’ for both!). The Gaussian Blur noise reduction and Unsharp Mask sharpening are basic tools which you would find in most image manipulation applications. They are relatively quick to calculate. The downside of these options is that use of the ‘Gaussian Blur’ noise reduction tool will tend to reduce image sharpness and the ‘Unsharp Mask’ sharpening tool will tend to increase image noise. With careful adjustment of the parameters, these simple tools can suffice to give useful image improvements in many cases. The Gaussian Blur noise reduction tool does not require a SharpCap Pro license to use.
SharpCap Pro users also have the option to use the more sophisticated tools:
Bilateral Filter noise reduction which can lower noise with less blurring effect than the Gaussian Blur option. This tool will tend to remove noise within areas of similar colour without blurring an area of one colour into an adjacent area of another colour. The radius option selects over how large an area (in pixels) the smoothing is effective while the luminance tolerance specifies how different colours have to be for the algorithm to try to preserve the differences between them. Setting the luminance tolerance too high will make this algorithm give results similar to the gaussian blur option
Weiner Deconvolution is an advanced image sharpening algorithm that uses an estimate of the PSF (point spread function) of the image to try to correct for blurring introduced by optics, seeing and stacking. The estimate of the PSF is calculated from the shapes of detected stars in the stacked image (so this sharpening feature will only work for images containing stars). The only control that needs adjusting for this algorithm is the Signal-to-Noise ratio slider, which helps the algorithm determine which parts of the image are noise (and therefore shouldn’t be sharpened) and which parts are useful image (and should be sharpened). If this slider is turned up too high then you will see artifacts in the image – typically dark rings around stars and an ‘orange skin’ look to faint areas – if these symptoms are seen then turn down the S/N Ratio slider until a good result is achieved.
Note that both of the advanced algorithms require more computation than the simple ones, so using a fast PC is advisable, particularly for high resolution cameras.
Saturation control
This is a simple addition to the live stacking colour balance controls that allows the saturation to be adjusted in the range 0 (monochrome) -> 1(normal colour) -> 3 (highly enhanced saturation). Like the white balance controls, saturation adjustment is a SharpCap Pro feature.
PHD2 Guiding and Dithering support
While SharpCap live stacking can automatically correct for image drift and rotation on unguided (and even Alt/Az) mounts, fixed pattern noise in the images being stacked can contribute to visible artifacts in the stacked image. A common example of this problem is so called ‘raining noise’ where darker or brighter pixels create dark or light streaks across parts of the image as their position on the stack drifts gradually. The resulting pattern can look like rain slashing downwards, hence the name. While proper use of darks and flats can help reduce or eliminate this issue, in some cases dithering can be the best approach as the random movements of the darker/lighter pixels ensure that there is no visible pattern that is easily noticeable to the eye.
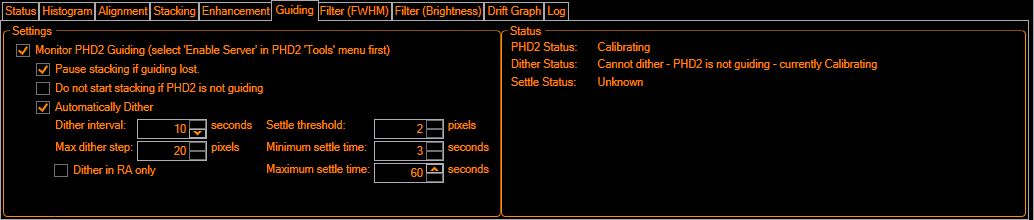
SharpCap 3.2 adds support for monitoring the status of the PHD2 guiding application and also automatically triggering the dither functionality of PHD2 at a selectable interval. When the dither interval timer expires, SharpCap will wait for the current frame to end, stack it, pause live stacking and send a message to PHD2 to begin the dither movement. Once PHD2 reports that the dither movement has settled, SharpCap will wait for the frame currently in progress to end and then unpause live stacking and start the dither timer running again. This sequence should ensure that any frames that are streaked by the dither movement are not included in the stack.
Additionally it is now possible to set up SharpCap to automatically stop stacking if PHD2 loses it’s guiding lock and/or refuse to start stacking if PHD2 is not guiding – the first option is helpful to prevent a stack from being spoilt if guiding fails and the second simply helps avoid mistakes if you always want to guide while stacking.
Monitoring the status of PHD2 and automatically stopping stacking if PHD2 stops guiding does not require a SharpCap Pro license, but the automatic dithering function does. Note that currently the only guiding application supported is PHD2 and it must be running on the same PC as SharpCap.
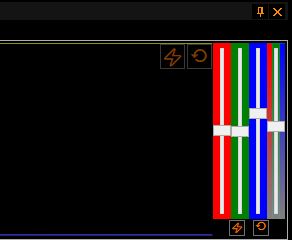
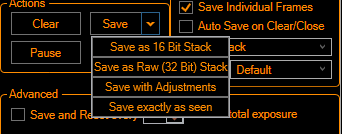
Option to save exactly as seen on screen
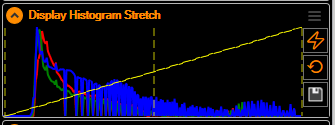
The display stretch controls in the mini histogram on the right hand side do not affect the saved image (they are only designed to affect the image as shown on screen in SharpCap). However, if you did want to save the image exactly as seen on screen the only way to do it was to take a screenshot, which is hardly idea.
SharpCap 3.2 adds the option to save the image exactly as seen onscreen. The saved image is always saved as a PNG file in 8 bit depth regardless of camera bit depth or other save settings, since the goal here is to save an image for later vieweing rather than further processing. To avoid confusion with the normal save functionality, the save as seen function is activated by a small save button in the mini histogram.
Additionally, for convenience while live stacking the functionality can also be accessed from the live stack save drop down button.
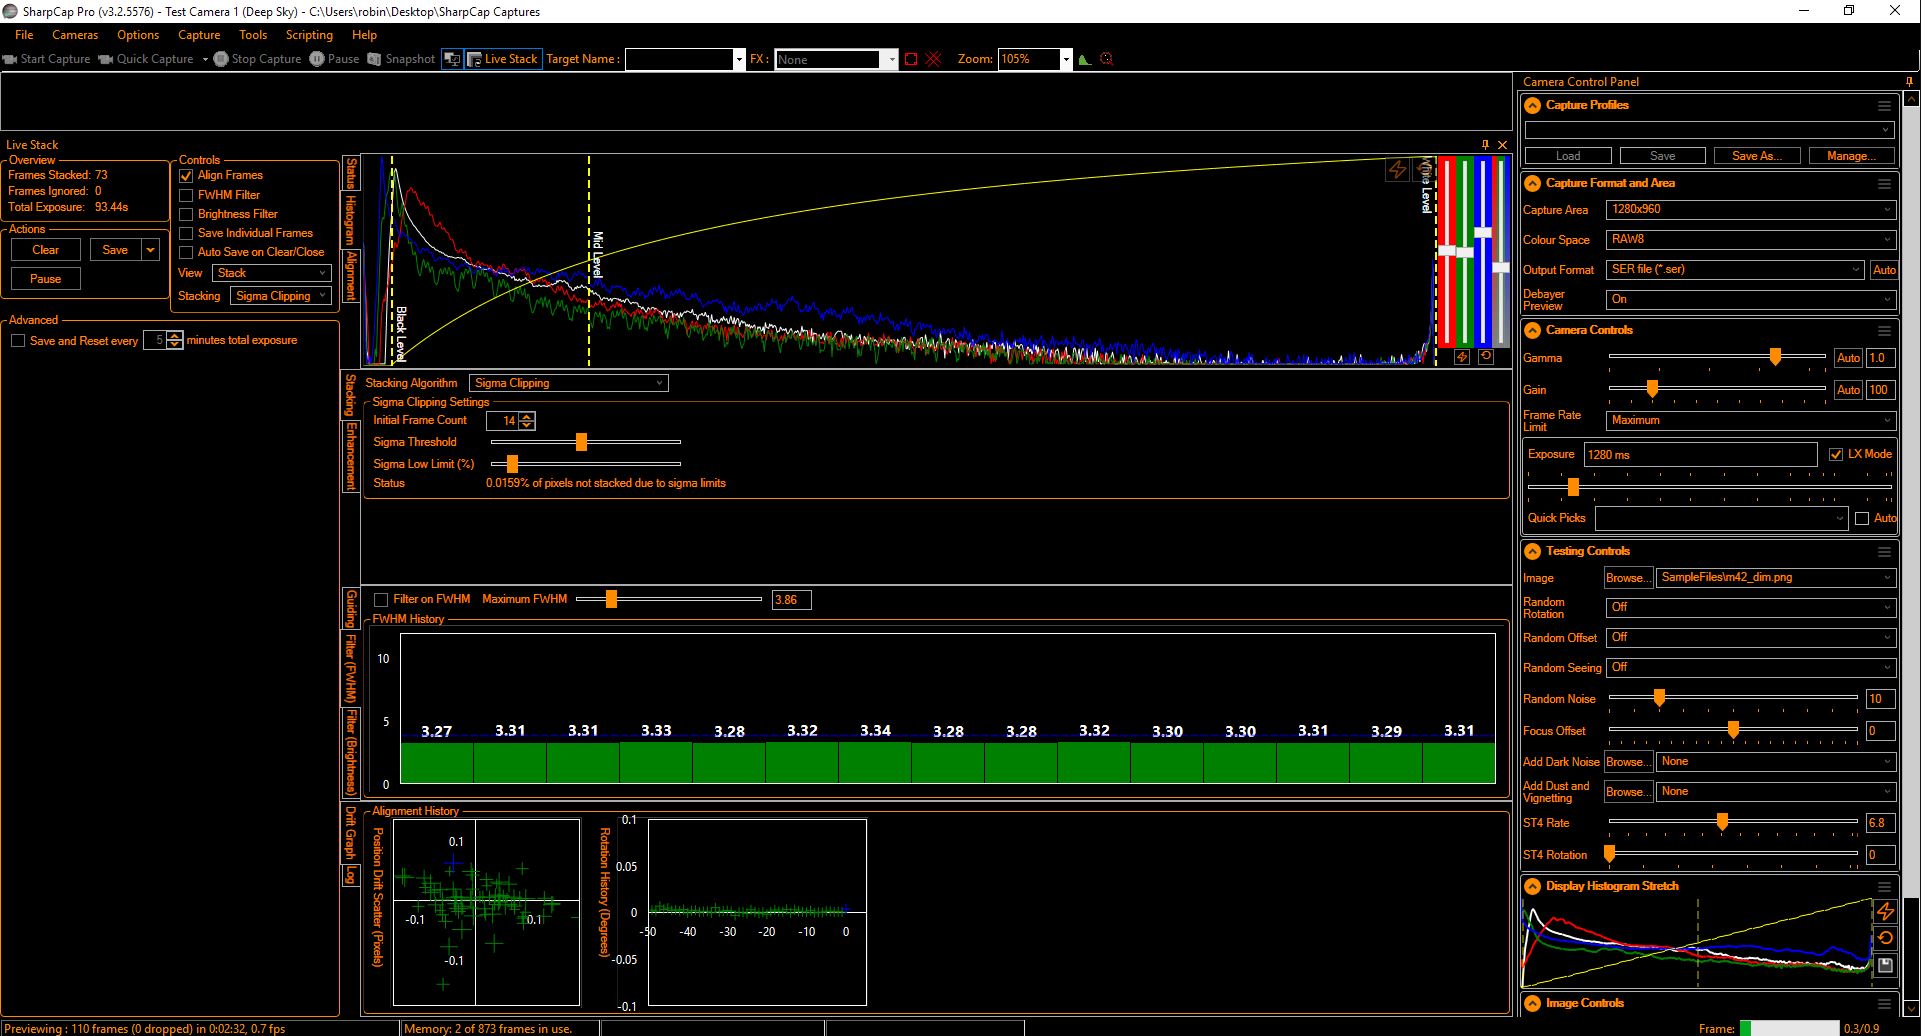
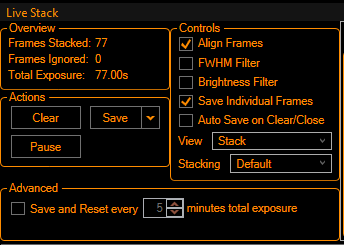
Expanded Live Stack controls in two monitor mode
Perhaps a picture can say it all – when in two monitor mode you have much more space available so the Live Stacking controls use it

Auto “Stack Save and Reset” option
This is a simple but handy addition Live Stacking which allows you to set up the software to automatically save the current stack and reset to start stacking again automatically after a user defineable total stacking time has been reached. By setting this to 5 minutes, at the end of an hours stacking you will have 12 completed 5 minute stacks saved which can then be further post-processed in a more traditionally stacking application. The use of a number of shorter stacks reduces the chance of a large amount of data being spoiled by an unlucky event such as a airplane trail or by changing conditions. Of course live stacking has other ways to control these problems (Sigma clipped stacking, FWHM filter, brightness filter, etc, so be sure to explore those features too).
Other Improvements
Filename template improvements
The following new tags have been added to the filename templating engine
- FrameDate
- Exposure
- Gain
- BlackLevel
The Exposure tag will format the exposure in either seconds or milliseconds. The Gain and BlackLevel values are only available when the exposure time is over 100ms.
Flat frame capture improvements
SharpCap 3.2 improves the built in flat frame capture tool by allowing you to correct for camera black level (dark correction) when capturing flat frames. There are two ways that you can do this
- Use a pre-captured dark frame that was captured at the same camera settings that you are planning to use to capture flat frames. This provides the best correction, but requires you to manually capture and select a dark frame with appropriate settings. You should use this option if your flat frame exposure time is long enough to give you problems with hot pixels.
- Check the ‘Capture and Subtract bias frames to remove offset’ option in the Capture Flat window (this option can only be selected if normal SharpCap dark subtraction is *not* enabled). With this setting enabled, SharpCap will capture normal flat frames and then capture a series of very short exposure bias frames which allow the camera black level to be corrected for.
When using the automatic bias frame capture and subtraction you don’t need to cover the telescope aperture while the bias frames are being captured – the reduction in exposure time will be enough to make them dark (or close to dark) and even if they are not entirely dark it will not have an adverse impact on the quality of the final flat frame.